Easy 30-Minute Buttermilk Drop Biscuits: No Rolling Required
Imagine warm, golden-brown biscuits emerging from your oven, filling your kitchen with an irresistible aroma. Now, imagine achieving this flaky, tender perfection in less than 30 minutes, without the sticky mess of rolling pins or the fuss of biscuit cutters. Sound too good to be true? Not with
Fluffy Buttermilk Drop Biscuits: The Simple No-Fuss Recipe! This ingenious approach to classic homemade biscuits strips away the complications, leaving you with pure, unadulterated buttery deliciousness that’s shockingly simple to prepare.
If you've shied away from making biscuits from scratch, fearing the intricate steps and precision required, prepare to have your mind changed. These buttermilk drop biscuits are designed for the modern home cook – quick, easy, and endlessly satisfying. They deliver all the comforting flavor and light texture you crave, making them perfect for busy weeknights, leisurely weekend breakfasts, or any moment a biscuit craving strikes.
The Magic of Buttermilk Drop Biscuits: Flaky Perfection, No Fuss
Traditional biscuits often involve a delicate dance of cutting butter into flour, rolling out dough, and meticulously cutting shapes. While undeniably rewarding, it’s a process that can deter even seasoned bakers on a time crunch. Enter the buttermilk drop biscuit: a culinary marvel that bypasses these steps entirely.
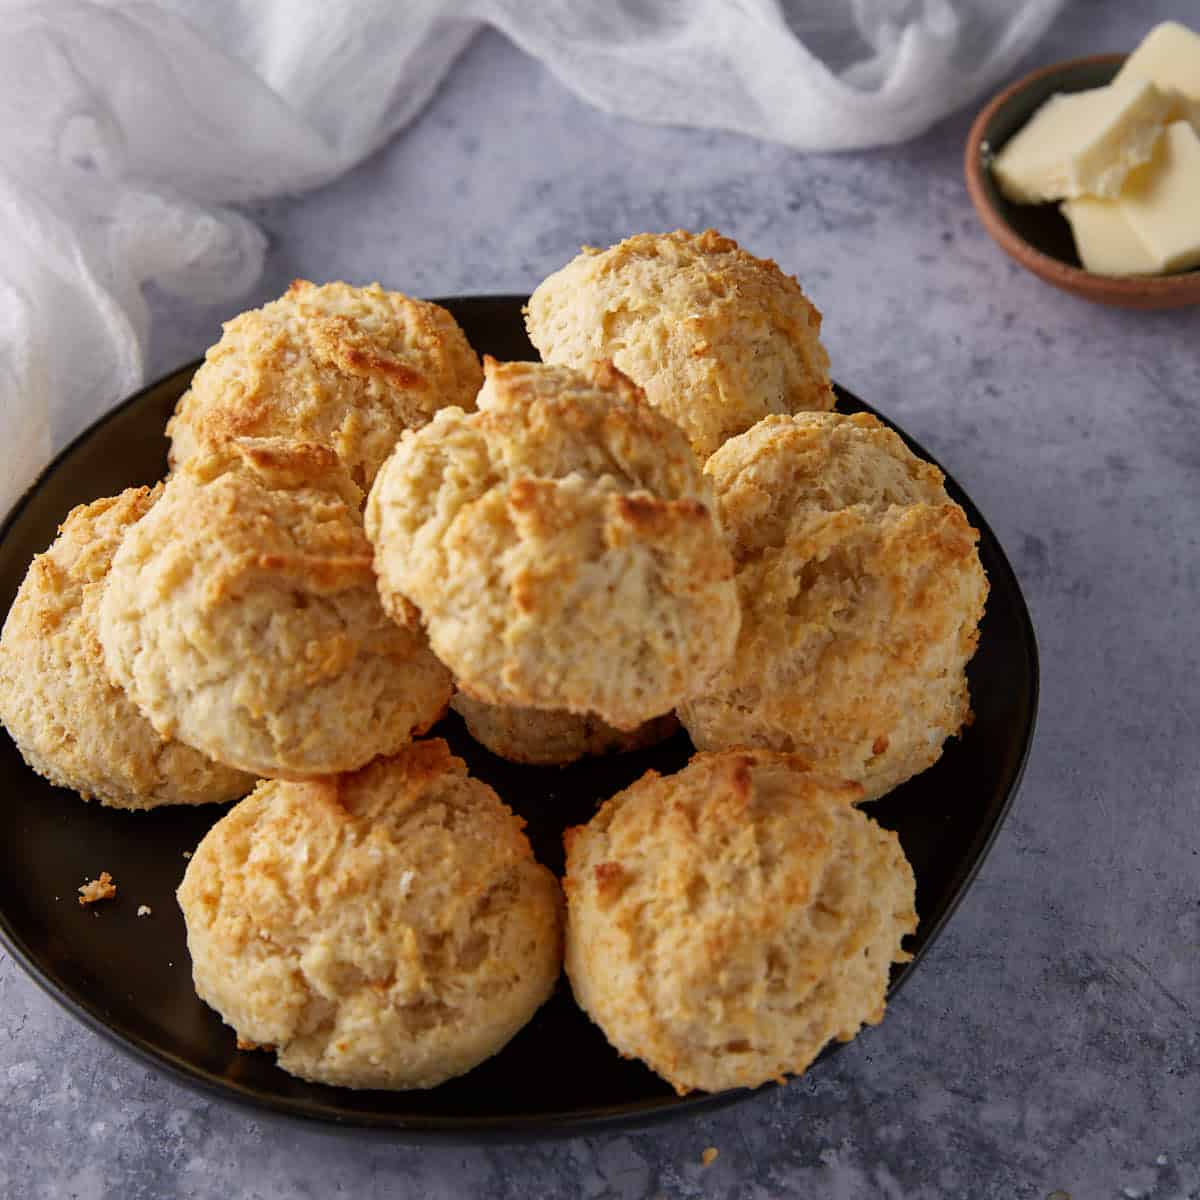
What sets drop biscuits apart? Primarily, their preparation method. Instead of forming a smooth, cohesive dough, you'll simply mix the ingredients until just combined, resulting in a somewhat lumpy, shaggy batter. This batter is then "dropped" – typically with a spoon or an ice cream scoop – onto a baking sheet. The result is a biscuit with a more rustic, craggy appearance compared to its perfectly round counterparts. While they may not rise quite as high as some traditional layered biscuits, their interior remains wonderfully soft, fluffy, and tender.
The beauty of these buttermilk drop biscuits lies in their incredible convenience. You get that authentic homemade taste and texture with minimal effort, transforming a potentially intimidating baking project into a joyful 30-minute endeavor. Your kitchen will smell divine, and your family will be convinced you spent hours slaving away – but that'll be our little secret!
Unlocking the Fluff: Why This Recipe Works in 30 Minutes
The speed and simplicity of these buttermilk drop biscuits aren't just about skipping the rolling; they're rooted in a clever interplay of ingredients and technique. Understanding the "why" behind each step ensures consistent success every time you whip up a batch.
The Power of Cold Buttermilk and Butter
The secret to those coveted flaky layers and tender crumb lies primarily in the temperature of your ingredients. Just like with traditional biscuits, very cold butter is crucial. As these small pieces of butter melt in the hot oven, they release steam, creating pockets of air that contribute to a light, airy texture. For drop biscuits, you'll start by melting most of your butter, but the interaction with cold buttermilk is where the magic truly happens. When cold buttermilk is whisked into slightly cooled melted butter, the butter miraculously clumps up into small, irregular pieces. These newly formed butter clumps then behave much like the cut-in cold butter in a traditional biscuit dough, fostering that internal flakiness.
Buttermilk itself is a superhero ingredient. Its acidity reacts with the leavening agents (baking powder and baking soda) in the flour mixture, producing carbon dioxide bubbles that help the biscuits rise beautifully and contribute to their signature tangy flavor. The natural acidity also tenderizes the gluten in the flour, preventing tough biscuits.
The Art of Minimal Mixing
When making biscuits, whether traditional or drop style,
overmixing is the enemy of tenderness. Flour contains gluten, and the more you mix or knead dough, the more gluten develops. While gluten development is desirable in breads for chewiness, it leads to tough, dense biscuits. For buttermilk drop biscuits, the goal is to mix the wet and dry ingredients just until they are barely combined. You should still see some lumps and dry streaks – that's perfectly normal and exactly what you want for a light, fluffy result. Mixing by hand with a spoon or spatula helps prevent overworking the dough, giving you more control over the texture.
Your Step-by-Step Guide to Irresistible Buttermilk Drop Biscuits
Ready to experience the ease of these incredible biscuits? Here’s a streamlined overview of the process that will have warm biscuits on your table in under half an hour. For a more detailed recipe, you might check out
Skip the Fuss: Quick & Easy Buttermilk Drop Biscuit Recipe.
- Preheat and Prep: Adjust your oven rack to the middle position and preheat your oven to a blazing 475°F (245°C). Line a rimmed baking sheet with a silicone baking mat or parchment paper (ensure your parchment is rated for high temperatures). This high heat is essential for a quick, impressive rise.
- Melt the Butter: In a large, microwave-safe bowl, melt most of your butter (leaving a small amount for brushing later) until about 90% liquid. Whisk until fully melted, then let it sit for 5 minutes to cool slightly. This prevents the buttermilk from curdling too dramatically.
- Whisk in Cold Buttermilk: Pour in your straight-from-the-fridge cold buttermilk. As you whisk, you'll notice the butter clumping up into small, irregular bits. This is exactly what you want, as these butter clumps will create those desirable flaky pockets.
- Add Dry Ingredients: In a separate bowl, whisk together your flour, baking powder, baking soda, salt, and any optional sugar. Then, add these dry ingredients to your butter-buttermilk mixture.
- Mix Just Until Combined: Using a spoon or spatula, gently fold the wet and dry ingredients together. Mix only until there are no pockets of dry flour remaining. The dough will be lumpy and shaggy, not smooth. Do not overmix!
- Drop onto Sheet: Using a ¼-cup scoop or two spoons, drop mounds of biscuit dough onto your prepared baking sheet, spacing them about 2-3 inches apart.
- Bake to Perfection: Bake for 12-15 minutes, or until the tops are light golden brown and the biscuits are puffed up.
- Optional Butter Boost: For extra buttery tops, melt the remaining butter and brush it over the warm biscuits as soon as they come out of the oven.
- Cool and Serve: Transfer the baking sheet to a wire rack and let the biscuits cool for about 5 minutes before serving. They are truly best enjoyed warm.
Pro Tips for Buttermilk Drop Biscuit Brilliance
While this recipe is incredibly forgiving, a few expert insights can elevate your buttermilk drop biscuits from good to absolutely glorious.
- Temperature is Key (Again!): We can't stress this enough – use cold buttermilk! The stark temperature contrast with the slightly cooled melted butter is crucial for creating those butter clumps that yield flaky biscuits. Room temperature ingredients simply won't give you the same results.
- Don't Be Afraid of Lumps: When mixing the dough, embrace the lumps! A slightly lumpy, rustic dough is what you're aiming for. Overmixing will develop too much gluten, resulting in dense, tough biscuits instead of light and airy ones. Think of it as mixing a muffin batter – less is more.
- High Heat for High Rise: The high oven temperature (475°F/245°C) is not a typo. It's intentional. The intense initial heat helps the biscuits rise quickly and creates a crisp exterior while keeping the interior tender.
- Consider Your Scoop: An ice cream scoop (specifically one that holds about ¼ cup) is your best friend for uniform-sized drop biscuits. This ensures even baking and consistent texture. If using spoons, try to keep your drops roughly the same size.
- Parchment vs. Silicone: Both silicone baking mats and parchment paper work well. Silicone mats offer excellent non-stick properties and are reusable. If using parchment, just double-check its temperature rating to ensure it can withstand 475°F (245°C).
- Best Eaten Fresh: While leftover drop biscuits are still delicious, they are truly at their peak when served warm, straight from the oven. The buttery aroma and tender crumb are unmatched.
Serving Suggestions & Beyond
Once you've mastered these easy buttermilk drop biscuits, you'll find countless ways to enjoy them. Their versatility is just another reason to keep this recipe in your regular rotation.
- Classic Spreads: Serve them warm with a generous smear of butter, your favorite strawberry jam, or homemade honey butter.
- Savory Pairings: They are absolutely divine alongside a rich sausage gravy for a quintessential Southern breakfast. They also make a fantastic side for hearty dishes like chili, stews, or a warm bowl of chicken soup. Don't forget their potential in a biscuit and gravy breakfast casserole!
- Creative Combos: Split them open for mini breakfast sandwiches with scrambled eggs and cheese, or as an accompaniment to fried chicken. They’re even surprisingly good for dipping into creamy dips or as a base for shortcake with fresh berries and whipped cream.
Storage: Keeping Them Fresh
Like most homemade baked goods, buttermilk drop biscuits are best enjoyed the day they are made. However, if you have any leftovers (a rare occurrence!), store them in an airtight container at room temperature for up to 2-3 days. To refresh them, a quick reheat in the microwave for 15-20 seconds or a few minutes in a toaster oven will bring back some of their original warmth and softness.
Conclusion
The dream of homemade biscuits is no longer reserved for experienced bakers or those with ample time. These easy 30-minute buttermilk drop biscuits prove that fresh, flaky, and utterly delicious biscuits can be a reality for anyone, anytime. By sidestepping the traditional rolling and cutting, you unlock a world of convenience without compromising on flavor or texture. So go ahead, embrace the simplicity, gather your ingredients, and get ready to impress yourself and your loved ones with the undeniable comfort of warm, homemade buttermilk drop biscuits. Your kitchen (and your taste buds) will thank you!